If you’d like to see any photo larger you can right click and open in a new tab or window, or just click on the photo and it’ll enlarge the image and you can scroll through the photos with your arrow keys. Push escape to return to the blog page.

Thursday, April 28, 2011

DIY - How I Paint Leather Shoes

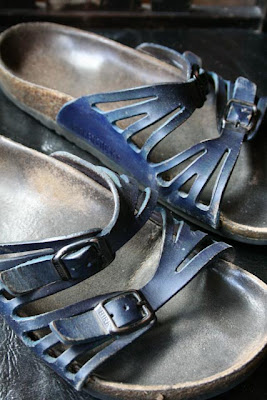
Several years ago I had a faded pair of lavender Birkenstocks which I decided I'd like better if they were a new color, so I pulled out my acrylic paints, and picked a favorite blue and proceeded to change the lavender to a dark, rich "Thalo" blue! This was so successful, I decided to take another pair of new lavender Birkenstocks and this time I painted them red. Below you can see the results of those do-it-yourself experiments.


The other day, while shopping at Goodwill, I came upon a very nice pair of leather Haflinger clogs. They fit perfectly, but I wasn't that crazy about their color. Since they were so affordable, I figured I'd paint them a new color, like I did before with my Birkies. ---but first a disclaimer---if you're reading this and are under 18, go ask a parent before you start painting any of your shoes! If you're 18 or over, please, don't proceed if you're at all unsure about the process... I've been painting for years, and am willing to experiment and possibly ruin a pair of shoes in the process. If you'd be really upset if you've ruined your shoes by painting them, do not attempt this! I doubt it's reversible... Now with that out of the way, here's what I used, and a photo gallery of the process:

1. First off, take photos of the original, unpainted clogs:


2. Gather supplies---cover table with old papers - notice ad for shoes - how appropriate! I used Burnt Umber acrylic paint, water in an old carton, a carton lid for my paint palette, a palette knife & an inexpensive soft brush.


3. Use pliers to open old paint tube. Mix with water - realize paint is really old, and it won't mix, it just stays in a lump on the palette. Rinse off in sink, hoping it eventually dissolves in pipes... Find almost empty tube of newer looking Burnt Umber. Squeeze out another blob onto palette and mix with water and palette knife. Once you have a very watery bit of paint next to the main lump of paint, use your soft brush and start applying smoothly to shoe. I started with the back seam, and worked my way around to the front sewn panel, spreading the watered down acrylics, adding more water, more paint, and trying to keep a consistent amount and flow all around the panel. Work some paint over the edge of the shoe, where it goes into the foot bed, just over the seam.


4. Once the panel is covered as smoothly as you can, start painting the rest of the shoe, starting at the corner near the panel, and working fast but wet and consistent over the whole rest of the front of the shoe.


5. Stop to take more photos - showing the first painted coat on one shoe, next to the unpainted second shoe.


6. Start painting second shoe, working from the back seam around to the other side, covering the panel first. Work with a lot of water, making sure any lumps are smooth on the paint palette (lid) before applying to shoe.


7. Once panel is covered, paint the rest of the shoe.


8. When you've finished painting both shoes, check to see if the first shoe is pretty much dry. If it is, go ahead and paint a second coat. Again, use very thinned, watery acrylics. Do the same for the second shoe.


9. Let dry several hours, or overnight. Paint one more coat, again using a very watered down, thinned paint. It helps to keep everything wet in each section as you paint, smoothing with your brush to keep the layers of paint distributed over the whole section (like I did in the panel section, then the front shoe section, painting each separately). If the paint isn't thinned down ahead of time, it might streak, or leave spots where the paint is thicker. Some differences in way the paint soaks in creates some darker areas which are not easy to avoid, however I think this adds to the whole "distressed oiled" leather look.


10. When dry, wear happily!

Saturday, April 02, 2011

Now, showing at Sequoia Gallery and Studios:

This month in Hillsboro Oregon at the Sequoia Gallery I'll be showing a new painting, completed two weeks ago. They're having a show called Hip To Be Square which consists of all pieces being created on a 12x12" canvas. Since that's one of my favorite sizes to work with, I thought it was a good fit, and contacted the gallery to see if I could participate - you see, they asked for Portland area artists. Lucky for me they thought Corvallis was ok! Here's what their postcard looks like - You are invited to go check it out!!


Here's what I painted for this show - the background was watercolored, then I painted over the watercolor with pastel. It's my new favorite!!


The reception will be Tuesday evening, April 5th, 2011 at Sequoia Gallery, 6:00-8:00. Hope to see you there!
xoxo

Saturday, February 19, 2011

'Bye Furley...


We sure loved you....!

Monday, January 31, 2011

Sunny Weekend Adventures

This past weekend we emerged from our entrenched fog to sunshine and mild temperatures. That coincided with a planned hike Saturday morning and when we woke to bright skies Sunday, I insisted we get out again, and find a sunny place to explore. I believe this is somewhat a reflection of my upbringing. When I was growing up, I loved nothing more than curling up with my latest book and flying away into my imagination. That would come to an abrupt halt when my Mom would insist I put my book down & go outside and play - it was sunny! Since we lived in Oregon, the land of rain and little sun, the appearance of that brilliant orb was a rarity. Mom must have had an inner belief we needed sunshine, before all the benefits of vitamin D were even realized. She was ahead of the times as she'd nudge me out the door. Now, I feel a bit guilty if I'm indoors on a rare sunny day, so this weekend, we made sure to get out and enjoy it!

Saturday morning I met up with a couple of friends and we took an ambitious hike from one friend's house to Fitton Green, a lovely natural area that is west of town and has a terrific view of the Cascade mountains and the neighboring town. Here are a couple of photos I shot that morning. The first was just starting out on the trail, the last 3 were at Fitton Green.


This is a great place to hike in winter, with plenty of open areas and terrific views.

Sunday, we headed to Snag Boat Bend, a part of Finley Wildlife Refuge on the east side of the Willamette river. It's about a mile south of Peoria and we decided to go there for the open fields and abundant sunshine we hoped to find. We'd stopped there before, but had never walked the trails. We had the place to ourselves - well, almost... Ducks flew off as we came upon the waterways, a heron squawked as it headed skyward, upset at being disturbed, several hawks soared overhead, calling out to one another, 3 small nutria scampered under a duck blind and a bunny froze hoping to be camouflaged in some blackberry bushes. As you can see from the photos below, we found sunshine!