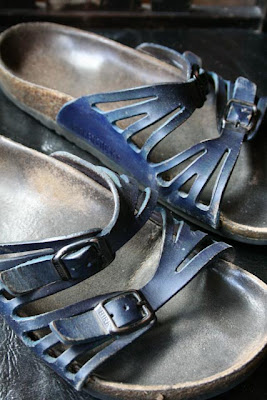

The other day, while shopping at Goodwill, I came upon a very nice pair of leather Haflinger clogs. They fit perfectly, but I wasn't that crazy about their color. Since they were so affordable, I figured I'd paint them a new color, like I did before with my Birkies. ---but first a disclaimer---if you're reading this and are under 18, go ask a parent before you start painting any of your shoes! If you're 18 or over, please, don't proceed if you're at all unsure about the process... I've been painting for years, and am willing to experiment and possibly ruin a pair of shoes in the process. If you'd be really upset if you've ruined your shoes by painting them, do not attempt this! I doubt it's reversible... Now with that out of the way, here's what I used, and a photo gallery of the process:
1. First off, take photos of the original, unpainted clogs:


2. Gather supplies---cover table with old papers - notice ad for shoes - how appropriate! I used Burnt Umber acrylic paint, water in an old carton, a carton lid for my paint palette, a palette knife & an inexpensive soft brush.

3. Use pliers to open old paint tube. Mix with water - realize paint is really old, and it won't mix, it just stays in a lump on the palette. Rinse off in sink, hoping it eventually dissolves in pipes... Find almost empty tube of newer looking Burnt Umber. Squeeze out another blob onto palette and mix with water and palette knife. Once you have a very watery bit of paint next to the main lump of paint, use your soft brush and start applying smoothly to shoe. I started with the back seam, and worked my way around to the front sewn panel, spreading the watered down acrylics, adding more water, more paint, and trying to keep a consistent amount and flow all around the panel. Work some paint over the edge of the shoe, where it goes into the foot bed, just over the seam.


4. Once the panel is covered as smoothly as you can, start painting the rest of the shoe, starting at the corner near the panel, and working fast but wet and consistent over the whole rest of the front of the shoe.


5. Stop to take more photos - showing the first painted coat on one shoe, next to the unpainted second shoe.


6. Start painting second shoe, working from the back seam around to the other side, covering the panel first. Work with a lot of water, making sure any lumps are smooth on the paint palette (lid) before applying to shoe.


7. Once panel is covered, paint the rest of the shoe.


8. When you've finished painting both shoes, check to see if the first shoe is pretty much dry. If it is, go ahead and paint a second coat. Again, use very thinned, watery acrylics. Do the same for the second shoe.


9. Let dry several hours, or overnight. Paint one more coat, again using a very watered down, thinned paint. It helps to keep everything wet in each section as you paint, smoothing with your brush to keep the layers of paint distributed over the whole section (like I did in the panel section, then the front shoe section, painting each separately). If the paint isn't thinned down ahead of time, it might streak, or leave spots where the paint is thicker. Some differences in way the paint soaks in creates some darker areas which are not easy to avoid, however I think this adds to the whole "distressed oiled" leather look.


10. When dry, wear happily!


